
Back to Miscellaneous
Originally uploaded on 28/05/2017
Want to know how a Stereo Ninja Music song is made? This blog post will take you behind the scenes, detailing the processes involved in the creation of one of my songs.
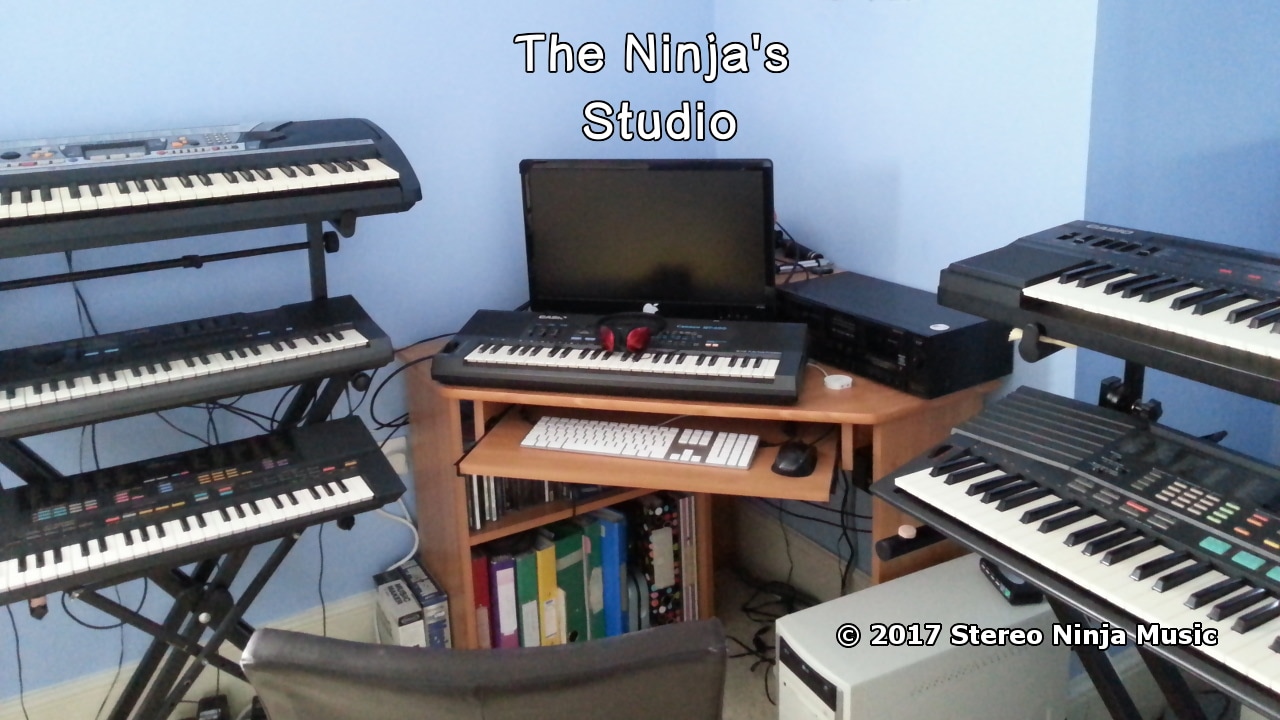
A view of my home studio
The first steps involve setting things up and choosing which keyboard or synth to use in the project. I’m not going to go into that much detail into how I connect the keyboards to a computer as I have already covered that in a previous article, which you can view by clicking here.
What synth I use really depends on what style of song I am going for. I generally use the Casio HT-700 in my projects as the sounds it can produce suit the majority of the song genres I use.
What synth I use really depends on what style of song I am going for. I generally use the Casio HT-700 in my projects as the sounds it can produce suit the majority of the song genres I use.
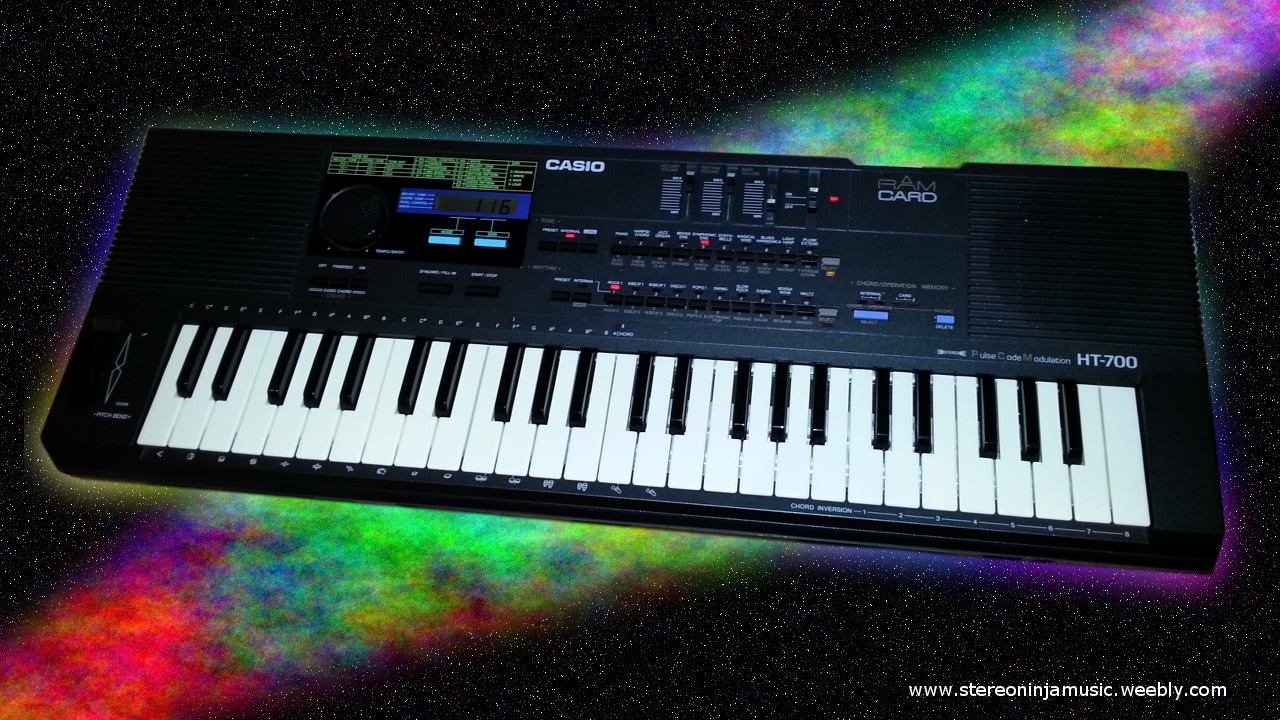
The Casio HT-700 is frequently used in my music
|
All of the synths and keyboards in my studio are connected to a mixer via a Y cable, which has a 3.5mm TRS connector on one end and 2 ¼ inch TS jack connectors on the other. This is because the mixer has balanced inputs and simply connecting a 3.5mm TRS cable to it will produce a stereo difference signal.
|
To control the keyboards, I use a MIDI splitter box that I made myself. This box simply has 6 MIDI connectors, which are connected in parallel to a single MIDI jack. The single MIDI connector is connected to the MIDI out jack of my USB to MIDI adaptor, while the other 6 jacks are connected to my keyboard’s MIDI inputs. This allows me to control all of the keyboards via MIDI without having to constantly unplug them.
As the keyboards will be receiving the same MIDI signal, I configure them to respond only to specific MIDI channels.
For example if I wanted the Casio HT-700 to play the MIDI data on MIDI channel 1, 2 and 3, I would set the HT-700’s MIDI receive channel to MIDI channel 1 and put it into multi-timbral mode. I would then configure the other synths in my setup to ignore channels 1, 2 and 3 so only the HT-700 will play those parts.
This is dependant on the synth used, and in some cases the MIDI channels are fixed. Refer to the instruction manual for details on how to setup the MIDI channels for your keyboard.
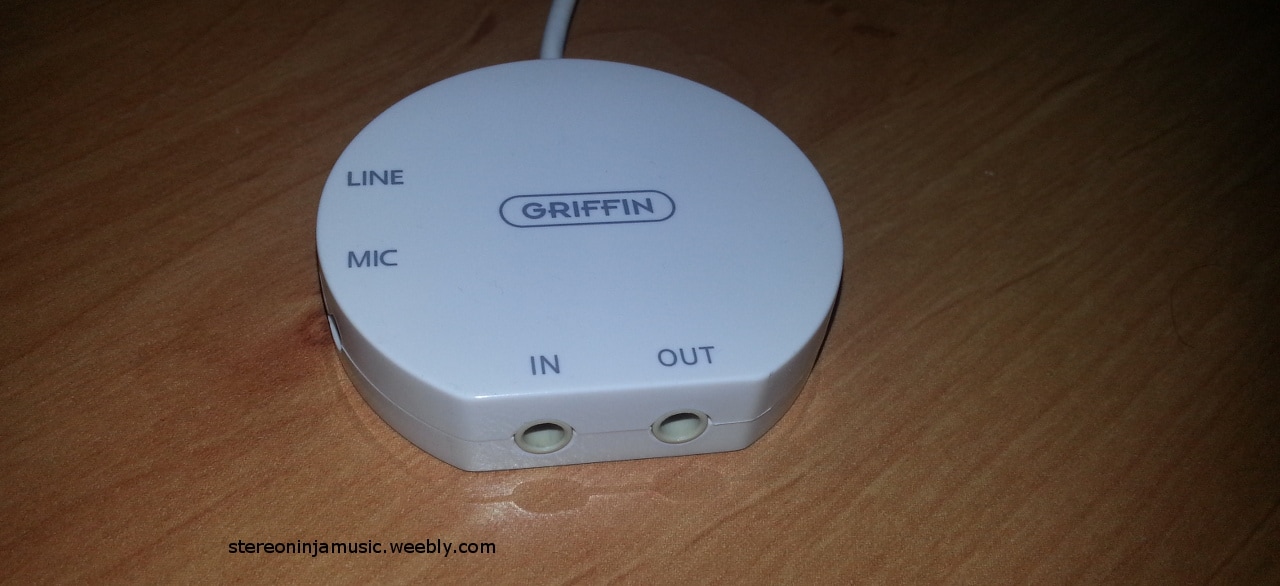
To record the audio output of the mixer, I use a Griffin iMic USB soundcard. I chose this particular soundcard as it has a stereo line level input.
As the keyboards will be receiving the same MIDI signal, I configure them to respond only to specific MIDI channels.
For example if I wanted the Casio HT-700 to play the MIDI data on MIDI channel 1, 2 and 3, I would set the HT-700’s MIDI receive channel to MIDI channel 1 and put it into multi-timbral mode. I would then configure the other synths in my setup to ignore channels 1, 2 and 3 so only the HT-700 will play those parts.
This is dependant on the synth used, and in some cases the MIDI channels are fixed. Refer to the instruction manual for details on how to setup the MIDI channels for your keyboard.
To record the audio output of the mixer, I use a Griffin iMic USB soundcard. I chose this particular soundcard as it has a stereo line level input.
As well as hardware synthesisers, I also use some software synthesisers, which mainly consists of the ES2 and EXS24 synths that came with my “Digital Audio Workstation” (DAW). I have also used some third party soft synths in my music such as DEXED, a Yamaha DX7 emulator.
The DAW program that I use is called Logic Pro 9. I use this to compose, record and mix my music.
I sometimes also use a free open source program called “Audacity” in addition to Logic Pro to edit some parts of my song.
For mixing, I use a Sennheiser HD 201 as my main headphones. During the mastering stage I use other headphones to hear how my track will sound with them and then make adjustments when needed.
To control the synths in my setup, I use an M-oxygen 25 MIDI controller. A MIDI controller is a keyboard with no tone generator and it is used for controlling MIDI instruments.
The USB to MIDI adaptor that I use for sequencing my keyboards is a “Turtle Beach USB to MIDI cable” which has on one end, a USB port and on the other, 2 5-pin din connectors.
Sometimes I use Audacity in addition to Logic
2 Composing the song
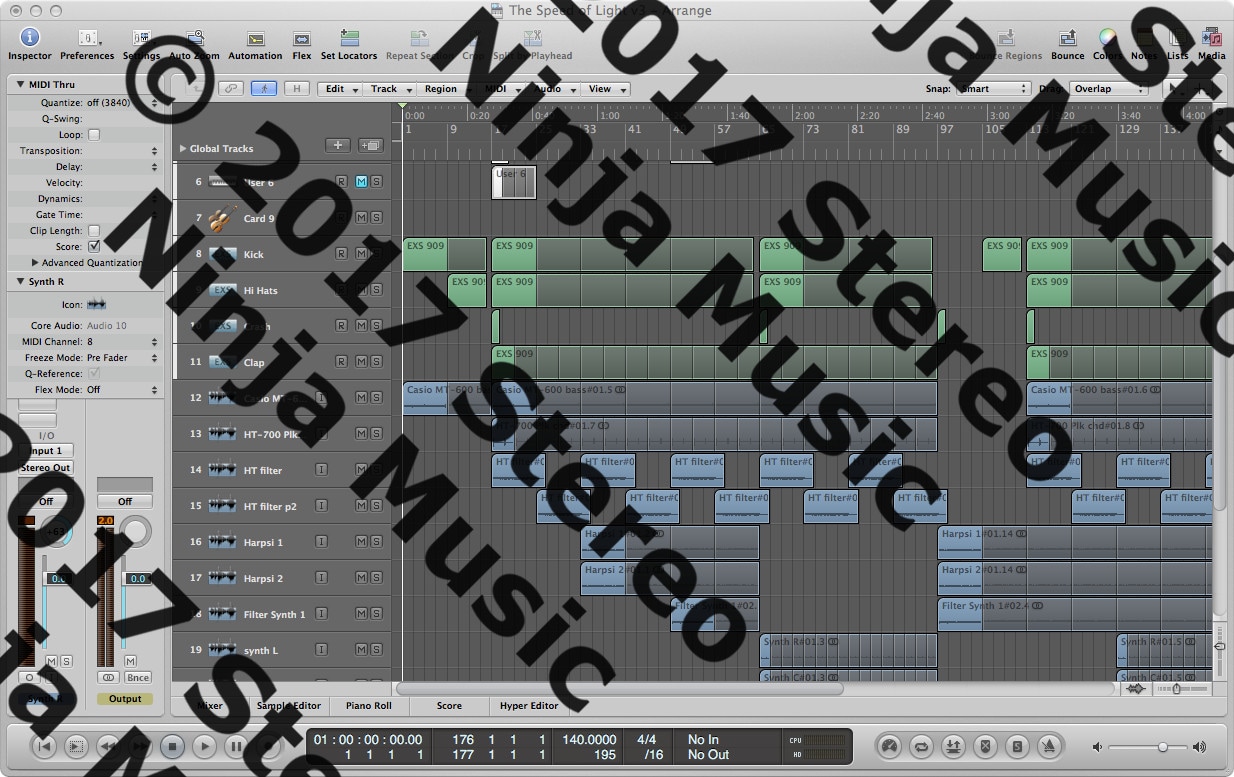
Screenshot of Logic Pro 9 with "The Speed of Light" loaded
After everything is setup, I begin composing the music. There are various ways in which I compose my music. Generally I hear a tune in my head and then record each part (e.g. bass, chord melody etc) in real time with the MIDI controller one after another.
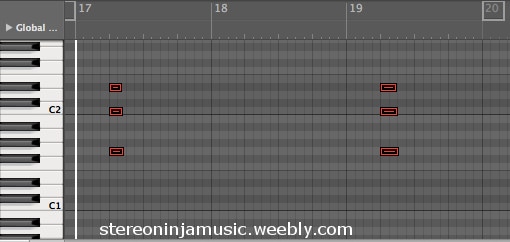
The "8-bit Ninja" is an example of a song where some parts were programmed in one by one
|
There were some songs however, where I programmed each note one by one. An example of a track is “The 8-Bit Ninja” during the arpeggio parts. “Pearl drops” is an example of a song that I created in part using a MIDI app on my phone. I noted down the tunes that I was hearing in my head at the time and then imported it into Logic to finish it.
|
The MIDI data is recorded first. I then correct any errors I’ve made during the recording as well as apply quantisation, which align the notes so that they play on beat. This is manly applied to the drums, but in some cases no quantisation is needed.
This screenshot shows the chords used in my track "The Speed of Light". The notes have been quantised so they are aligned on beat
3 Recording the Audio
After I have composed the song, I record the outputs of any hardware synths that I have used so that I can mix them and add external effects.
Before recording anything, I make sure that the volume levels are correct. If the volume levels are too high, it can result in distortion or clipping in the audio which can sound crunchy. If the audio levels are too low after being recorded, they can be boosted to adequate levels via a gain control, however too much gain can result in an audible hiss in the background. It is generally best to set the audio levels before recording to ensure the best quality.
Most of the time, I use a technique called “Overdubbing”. This involves recording each part individually (such as the bass, chord and melody etc.) and then layering them on top of each other so that they all play at the same time.
This technique is especially useful for over coming the limitations of a synth (e.g. limited polyphony or lack of multi-timbral mode etc.) as well as allowing me to adjust the volume and add effects to each track individually.
Overdubbing is usually done alongside the composition stage.
In some cases, overdubbing is not used if I am only using a synth that can operate in multi-timbral mode (playing multiple instruments simultaneously) such as the PSR-280 and little or no effects are used.
4 Mixing the audio
After I’ve recorded each individual part for my song, I then move to the mixing stage. This generally involves adjusting the levels of each track so that they blend together evenly. I also apply some effects to the tracks in this stage. It usually consists of reverb but sometimes I use effects like a stereo chorus or delay.
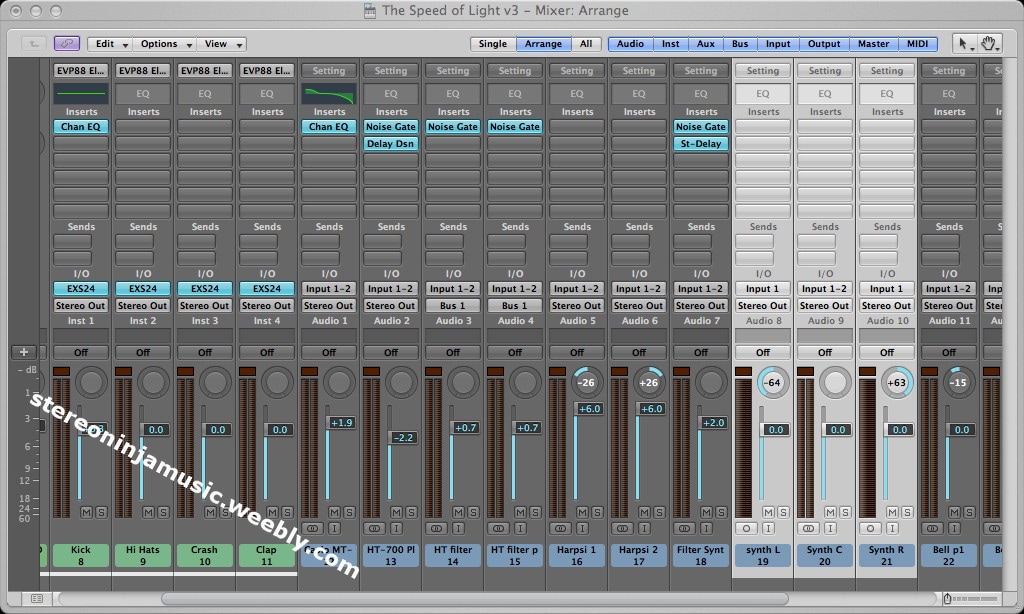
This is the mixing console in Logic. Here I adjust the levels of each individual track so that they blend well in the mix.
To help reduce hiss or noise I use a plugin called a “Noise gate” which shuts off the audio in a track if the volume falls below a defined level. In some cases an expander is also used, which makes the quieter parts quieter and the louder parts louder.
If I am using a synth or keyboard that can operate in multi-timbal mode, the mixing is usually done on the keyboard via MIDI. Keyboards like the PSR-280 and 48 allow you to adjust the volume of the individual MIDI tracks, although some features such as panning may not be available depending on the keyboard or synth used.
Refer to the MIDI specification chart in the manual to see what features your keyboard or synth supports via MIDI.
5 Finalising the audio
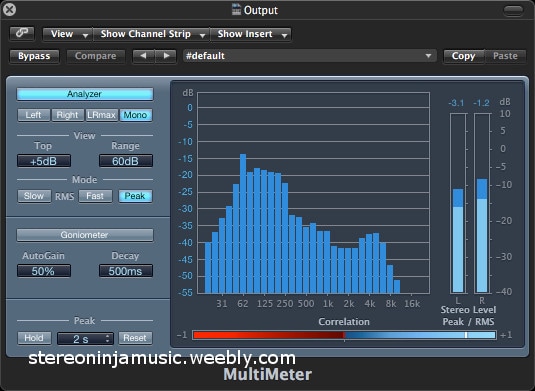
This image shows the "Multimeter" plugin in Logic which I use during the "Finalising" stage to make sure that the bass, midrange and treble are balanced.
|
After the mixing has been done, I then move on to the finalising stage. This involves adjusting the final stereo output channel by adjusting the EQ levels or adding reverb.
I have a limiter on the final output channel, but this is mainly used to prevent my Mac from outputting loud signals to my headphones as well as to prevent the audio from clipping. Usually I disable it after I’ve set the volume levels to prevent the track from sounding compressed. |
In addition, I sometimes use “Audacity” as it features a spectrograph. This enables me to visualise the audio frequency spectrum to see if there are any unwanted frequencies or noise present in the recording that I did not notice during the finalising stage.
An example of which I used this with was Supernova. As the gain levels were originally too high, it resulted in a persistent “hiss” sound in the background which could be heard during the quiet parts. I didn’t notice it during the finalising stage, it was only when I listened to the track with a different pair of headphones that I did.
I ended up re-doing the tracks to reduce the amount of hiss present which I then re-uploaded to both my website and “Bandcamp” page.
6 Exporting the audio
When I am satisfied with the final audio, I then proceed to exporting it so that I could upload it to my website, Bandcamp page and YouTube Channel.
In Logic this is done using a process called “Bouncing” and it involves merging the individual tracks into a stereo track.
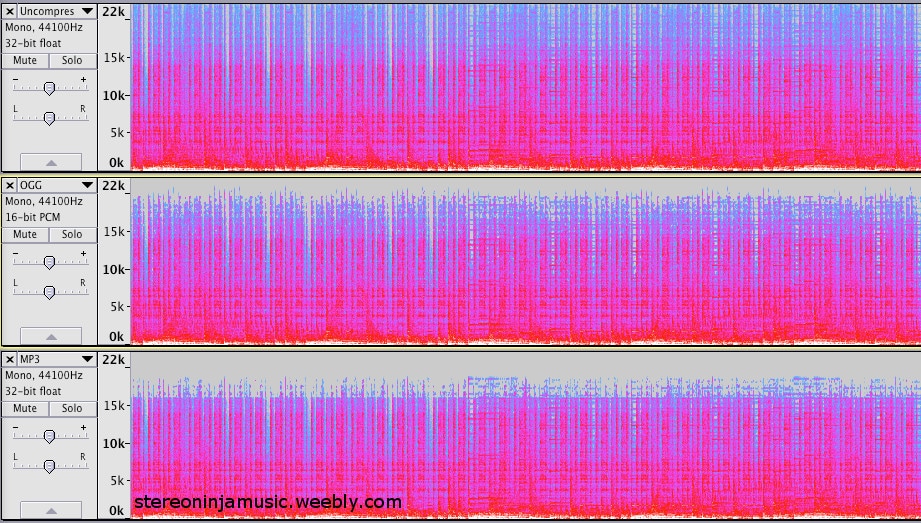
I save the final track in two file formats; a 192kbps MP3 file for my website and YouTube video as well as an uncompressed aiff file for archiving and for uploading to my Bandcamp page.
In Logic this is done using a process called “Bouncing” and it involves merging the individual tracks into a stereo track.
I save the final track in two file formats; a 192kbps MP3 file for my website and YouTube video as well as an uncompressed aiff file for archiving and for uploading to my Bandcamp page.
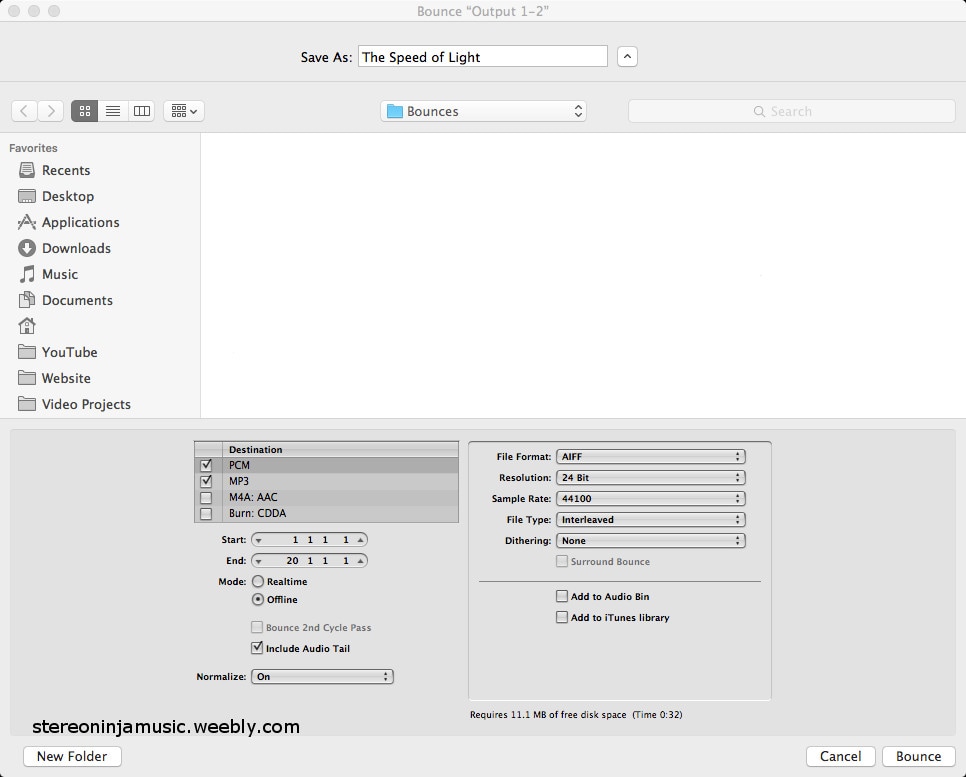
I export my music in two formats: MP3 and AIFF. Bouncing merges the individual tracks into 2 tracks (Left and Right)
7 Creating album art and custom thumbnail
Now that I have exported my track I start creating some album art for it as well as a custom thumbnail for my YouTube video. The program that I use to create this is called the “GNU Image Manipulation Program” or “GIMP” for short.
Usually I create the images from scratch layer by layer, but sometimes I use photographs of landscapes which I had taken with my phone. I add the album title to the image and then export it in 2 file formats; XCF format which stores all the individual layers and JPG format which is added to the MP3 files as well as my Bandcamp page.
Usually I create the images from scratch layer by layer, but sometimes I use photographs of landscapes which I had taken with my phone. I add the album title to the image and then export it in 2 file formats; XCF format which stores all the individual layers and JPG format which is added to the MP3 files as well as my Bandcamp page.
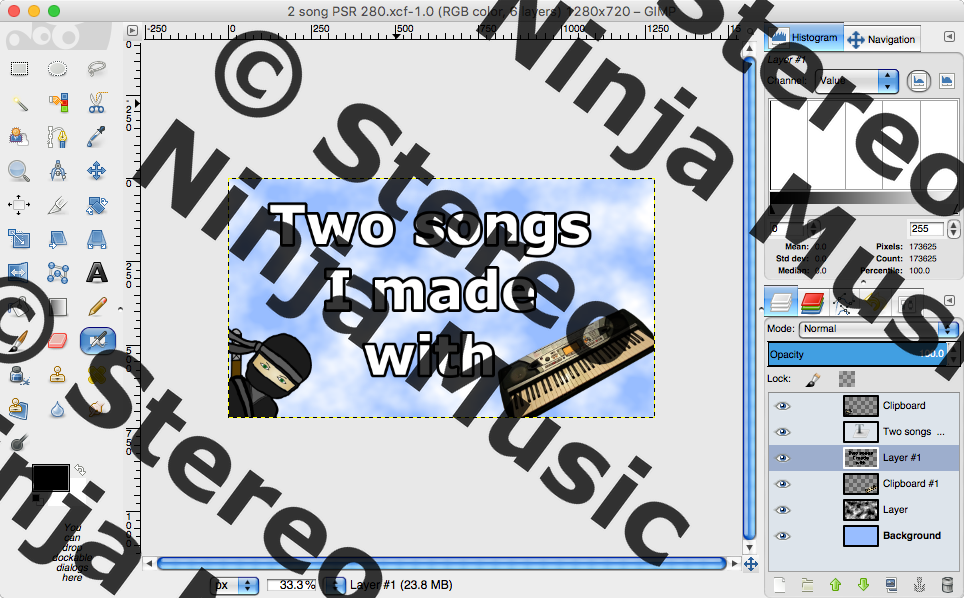
Editing the YouTube custom thumbnail for my video titled "Two songs I made with a PSR-280"
To add the album art to the mp3 files I use a free program called “MP3 tag”. I also use this program to add the correct metadata to the MP3 files such as the title, artist name and album name etc.
8 Creating the YouTube Video
Editing my video in iMovie
I cannot upload my music to YouTube directly as MP3 files, so I have to create a video. This used to be done using a program called “iMovie” which was bundled with my mac. I now use a program called "Kdenlive" to edit my newer videos. The type of videos I make to accompany my music varies. Some just contained images of the keyboards as a slideshow, while others used visualisations from programs like “Windows Media Player” or “iTunes”. Songs such as “The Jungle” contained footage of me playing and composing the song, where as my “Supernova” album just contained still images of the album art.
All my new videos begin with a short channel intro. The animation was created using “Microsoft PowerPoint” and the soundtrack was created in Logic. I used “QuickTime” to record the screen while playing the animation. While “PowerPoint” does support exporting the slideshow as a video file, I found that it outputs it at a low resolution (even if I set it to output at 720p) which results in a blurry video.
All my new videos begin with a short channel intro. The animation was created using “Microsoft PowerPoint” and the soundtrack was created in Logic. I used “QuickTime” to record the screen while playing the animation. While “PowerPoint” does support exporting the slideshow as a video file, I found that it outputs it at a low resolution (even if I set it to output at 720p) which results in a blurry video.
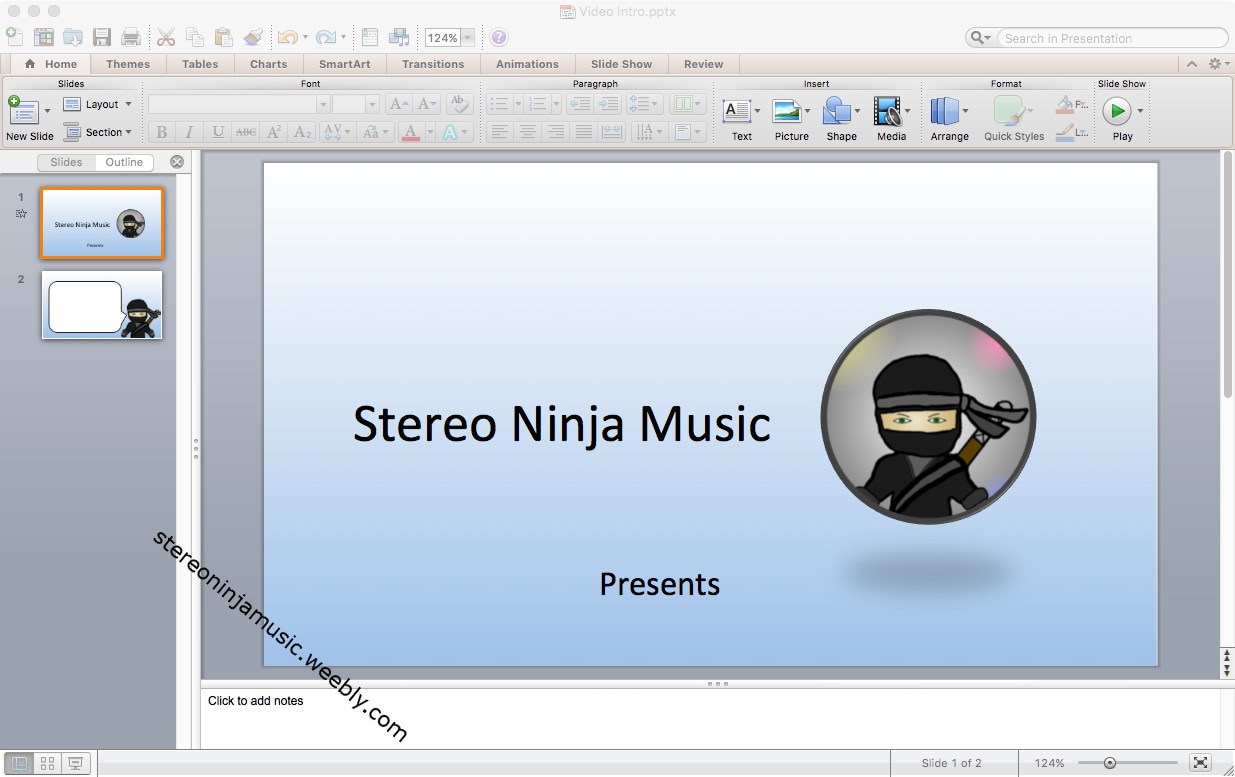
A screenshot of my video intro in Microsoft Powerpoint
After adding the ending screen to my video (which is a still image created with GIMP) I then export it as an MP4 file. Depending on the size of the video, I may compress the file using “QuickTime”. While it may reduce the quality a little bit, it reduces the file size which makes it easier for me to upload to YouTube.
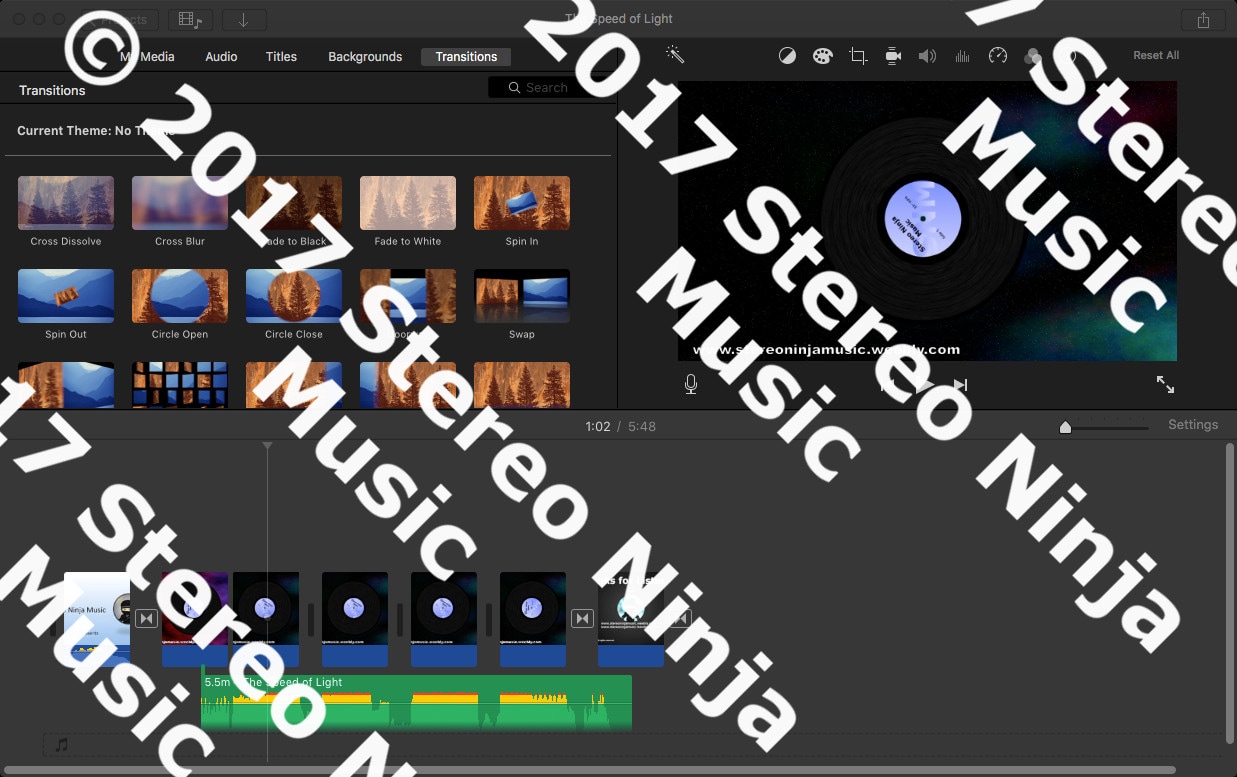
I now use Kdenlive to create animations for my newer videos which saves a lot of time by not having to record the screen.
I now use Kdenlive to create animations for my newer videos which saves a lot of time by not having to record the screen.
9 Sharing my music with the world
Now that the video is ready, I then upload to YouTube along with the custom thumbnail that I created earlier. I then add the video’s title, description and tags as well as add it to some playlists which contain songs I made with certain synths.
After the video has finished uploading, the song then gets uploaded to both my website and Bandcamp page. I then publish my video and my new song is ready to be listened by people around the world.
© 2017 - 2021 Stereo Ninja Music. All rights reserved.
If you would like to leave feedback on this post, feel free to use the contact form on the Contact page.
