
Back to Keyboards
Originally uploaded on 05/08/2016
A while back I did a blog post showing the hidden test modes on both the Yamaha PSS-580 and PSR-48 home keyboards. At that time, I didn’t know how to access the hidden test mode on the PSR-280, but thanks to YouTube user Honas Keyboard Channel, I can now show you the hidden test mode on the PSR-280.
The keyboard has two modes in which it can perform the tests; Automatic and Manual. Automatic, as it’s name implies, performs each test automatically although it does require the user to press the “Start/Stop” key to proceed through some of the tests. Manual allows the user to select which test to perform.
I’ve found that if the keyboard has been switched off and unplugged for a while, it will display the text “backuperr” or something like that if you try to access the test mode the first time you switch it on. This is most likely because the backup battery is flat and the keyboard resets the ram. If you switch the keyboard on, then off and then activate the test mode, the test mode will function properly.
To access the test mode, hold down the notes C#3 F3 G#3 for automatic mode or C#2 F2 G#2 for manual mode while powering the keyboard on.
If done correctly, the keyboard’s LCD should display the text “TEST”.
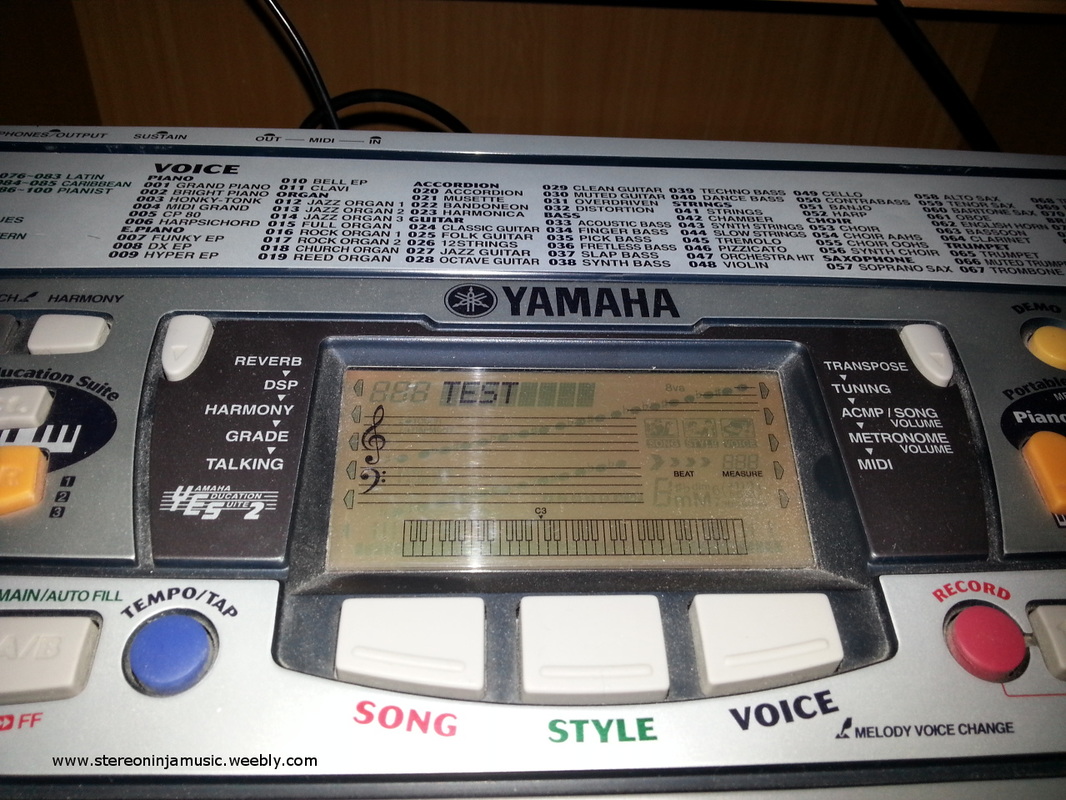
The Yamaha PSR-280 displaying the test screen
Different tests can be selected using the keypad and the “Start/Stop” button is used to start and exit the test.
The following tests can be performed on the keyboard using the test mode:
1. 001 Version check – Shows the firmware and wave versions on the LCD.
2. 002 ROM Check 1 – Checks the ROM.
3. 003 RAM Check 1 – Checks the RAM that is connected to the CPU.
4. 004 Wave ROM Check 1 - Checks that that ROMs containing the waves are connected to the CPU.
5. 011 Tone Generator Check 1 – Tests the tone generator by outputting sine waves at different pitches.
6. 013 Pitch check – Outputs a sine wave at 440 – 1.76 hz and sets the pan to centre. Allows the technician to check if the correct signal is produced.
7. 014 Output Right – Outputs a 1khz sine wave on the right channel.
8. 015 Output Left – Outputs a 1khz sine wave on the left channel.
9. 019 Noise – Allows the technician to measure the DAC noise.
10. 020 Switch Check – Allows the technician to check that the panel switches are working. The LCD screen will display which button to press and a sine wave will be produced when the button is pressed.
11. 028 LCD ON – Causes all the LCD elements to turn on.

The PSR-280 with all the LCD elements turned on. Notice some additional elements that are not used on the keyboard such as additional keys below and above what is currently playable. The LCD screen is most likely used in other keyboards such as the Yamaha PSR GX76, which is essentially a PSR-280 but with extra keys and a pitch bend wheel.
12. 029 LCD OFF - Causes all the LCD elements to turn off.
13. 031 Pedal 1 Check – Allows the technician to check the sustain pedal connector.
14. 037 MIDI Check - Checks that the MIDI connectors are working. A midi cable must be connected from the PSR-280’s MIDI output to the MIDI input in order for this test to work.
15. 041 ROM Check 2 – Checks that the ROM is connected to the CPU. This test takes a little bit longer than the first ROM test.
16. 042 RAM Check 2 – Checks that the RAM is connected to the CPU. This test takes a little bit longer than the first RAM test.
17. 043 Wave ROM Check 2 – Checks the Wave ROM. This test takes a little bit longer than the first test.
18. 046 Backup Check 2 – Checks the RAM backup.
19. 047 Factory Set – Resets the RAM to factory settings
20. 048 Test Exit – Exits the test program and restarts the keyboard.
So there you go; the hidden test mode on the Yamaha PSR-280. Special thanks goes to YouTube user Honas Keyboard Channel for helping me find the test mode and the service manuals for this keyboard. You can visit his channel by clicking here.
I was also able to obtain the service manual for the PSR-48/47 and after looking through it, I noticed that it made no mention of a test mode on the keyboard at all.
If you would like to provide feedback on this post, feel free to use the contact form on the Contact page.
